Recently, I came across challenge where we wanted to enable the Power Apps Community Portal for our blog website with custom domain name & SSL certificate, hence thought of writing of step-by-step guide on how one can achieve the same.
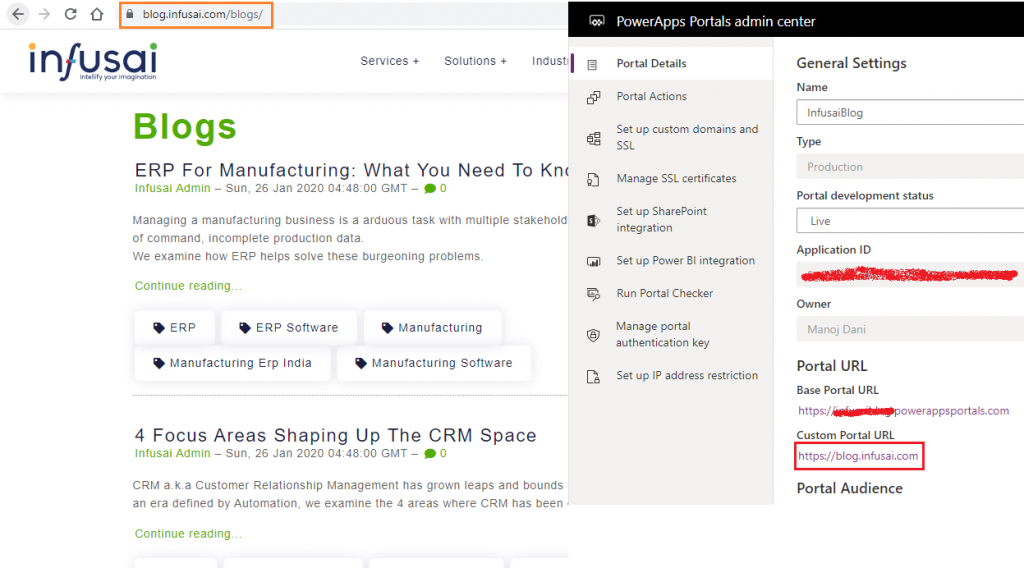
By default, your Power Apps portal will use Azure’s wildcard certificate which is used on all Azure sites. If you want to use a custom domain for your portal site, you will need a new SSL certificate for that domain.
Let’s look at as how to achieve the above output with step-by-step guide
In order to generate SSL certificate your certificate authority will ask for CSR (Certificate Signing Request). There are number of ways one can generate a CSR file, but here we are going to use IIS, as that’s the simplest option.
Step 1: Generate Certificate Signing Request
1.1 Open IIS & double click on Server Certificates
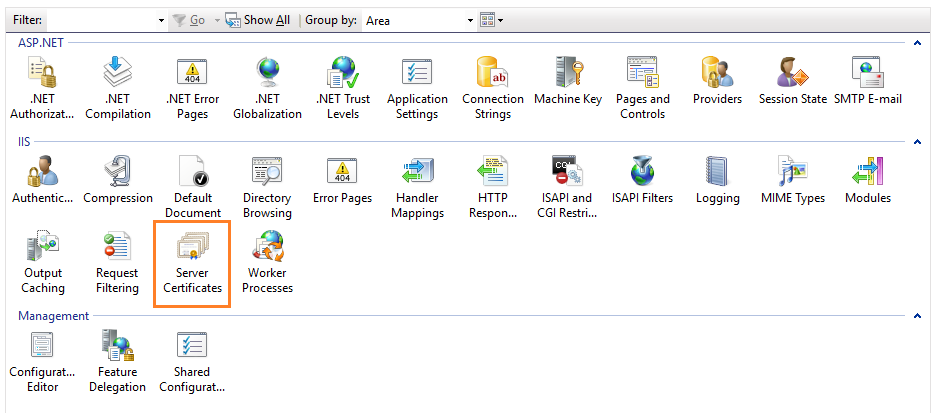
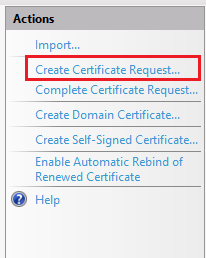
1.2 From the Actions bar on the right side, click Create Certificate Request…
1.3 Enter the appropriate details in distinguished name properties and click Next
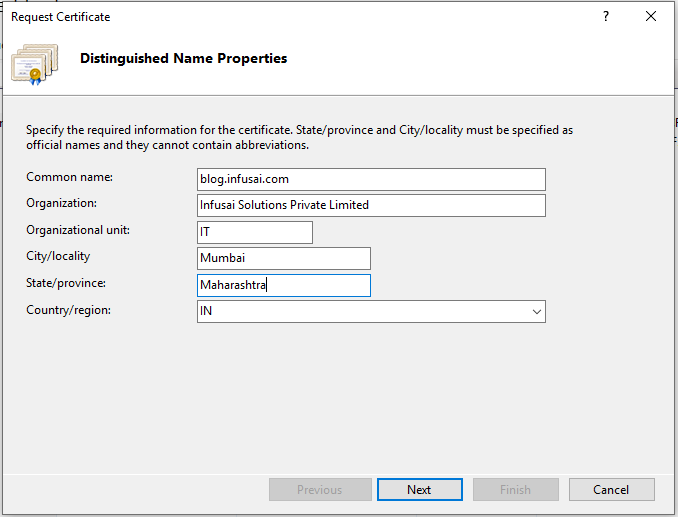
Note: Common name should contain the custom domain of your portal. For example blog.infusai.com
1.4 For the cryptographic service provider properties, leave Cryptographic service Provider as Microsoft RSA Channel Cryptographic Provider, change Bit length to 2048 and click Next.
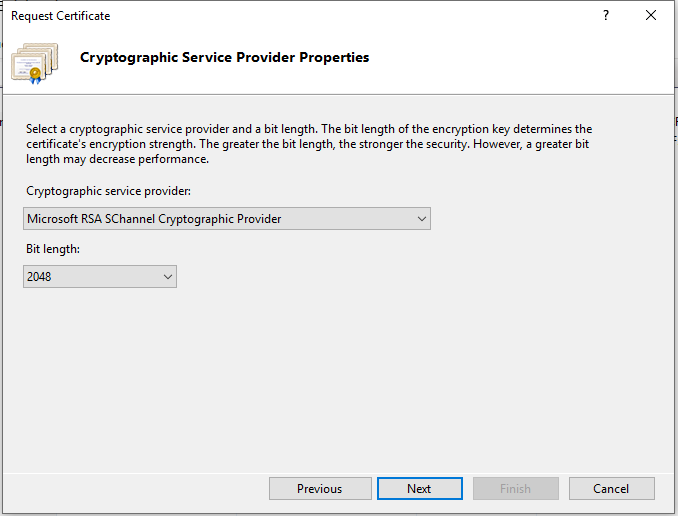
1.5 Specify a file name with the .csr extension and then click Finish.
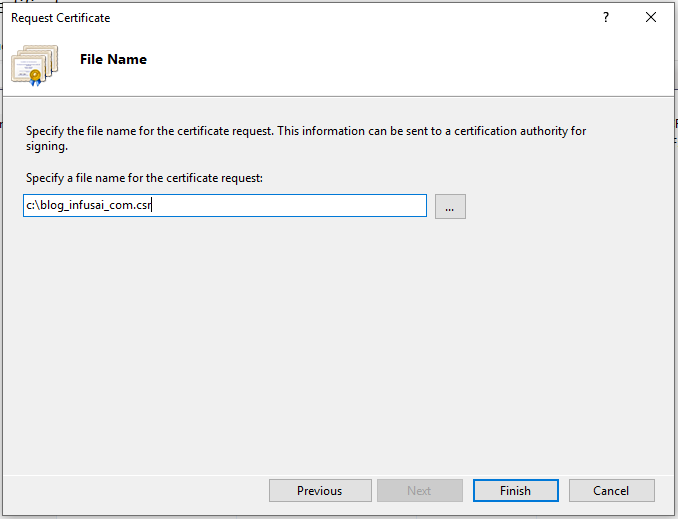
With this you would have a .csr file which you can submit to Certificate Authority who in turn can provide with new Certificate.
Step 2: Complete Certificate Request
Once your certificate authority has provided you with new certificate, you will need to complete the certificate request and export a PFX certificate file with password to be uploaded to the Power Apps Portal admin center.
2.1 Open IIS & double click on Server Certificates

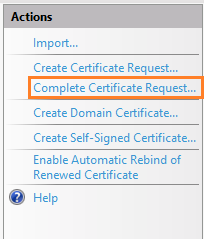
2.2 From the Actions bar on the right side, click Complete Certificate Request….
2.3 Select the certificate file you received from your certificate authority, give it a friendly name and leave the certificate store as Personal and Click OK.
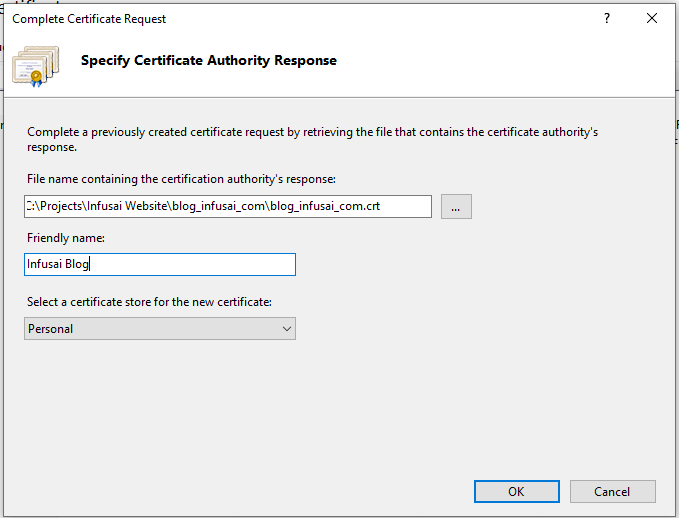
Note: Either you will have to change the certificate extension to .cer from .crt or in the Certificate file selection box change the filter from *.cer to *.*
2.4 Right click the new certificate record in the Server Certificates list and click Export…
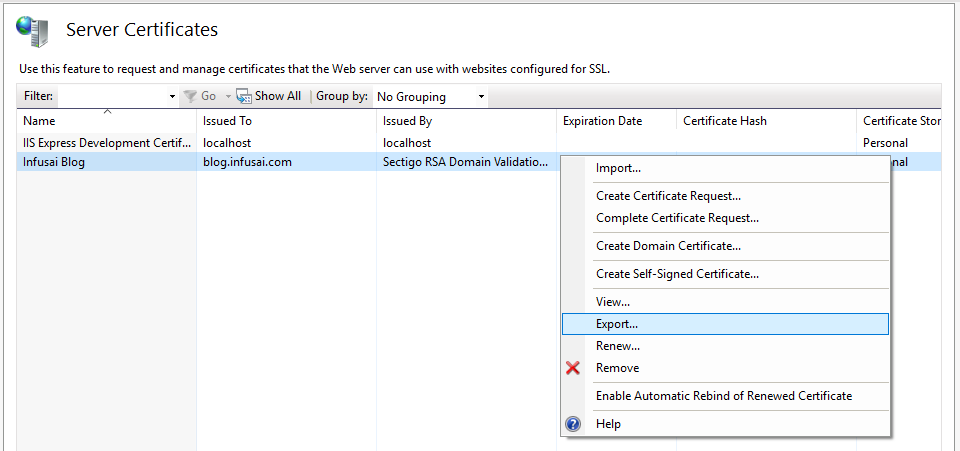
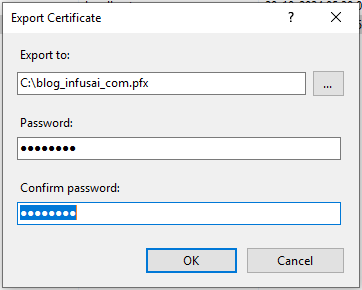
2.5 Select a location where you want the .pfx file to be exported and give strong password. Click OK
Note: Remember the password entered. You will need it when uploading it in Power Apps portal admin center
Step 3: Upload the certificate to Power Apps Portal admin center
3.1 Browse to the Power Apps Portals admin center for your portal and click Manage SSL certificates and Click on +Add new
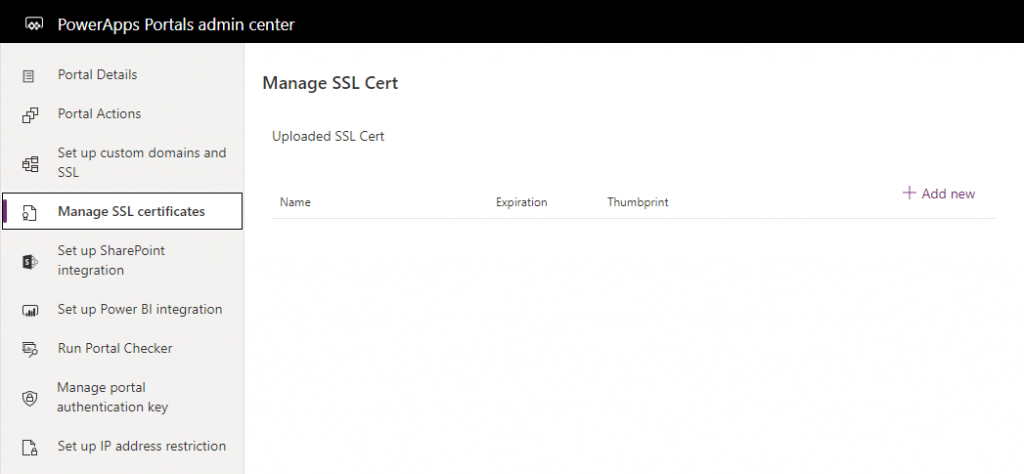
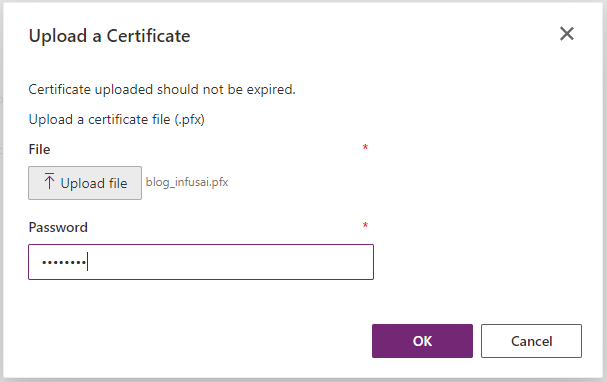
3.2 Click on Upload file button and select .pfx file generated in Step 2.5 along with the password provided and click OK
Step 4: Create Custom Domain & Bind SSL
Finally, now we can add our own custom domain & bind the SSL to finish this exercise
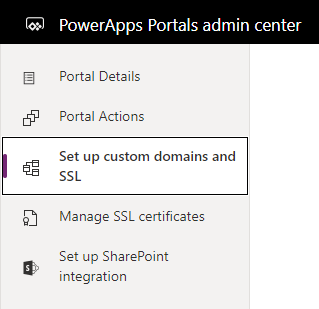
4.1 From the Power Apps Portal admin center click on Set up custom domains and SSL
4.2 Under SSL Bindings, click on + Add new

4.3 Select the Hostname & Certificate from the dropdown
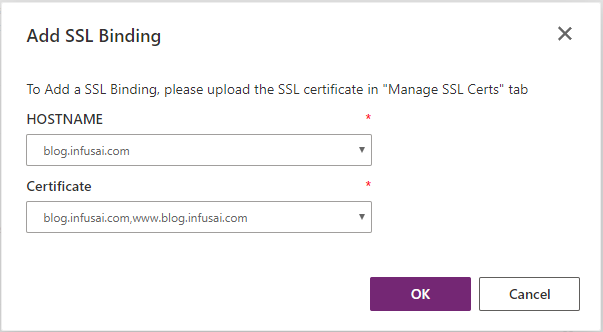
Note: Make sure you select same custom domain which you mentioned while generating .csr file
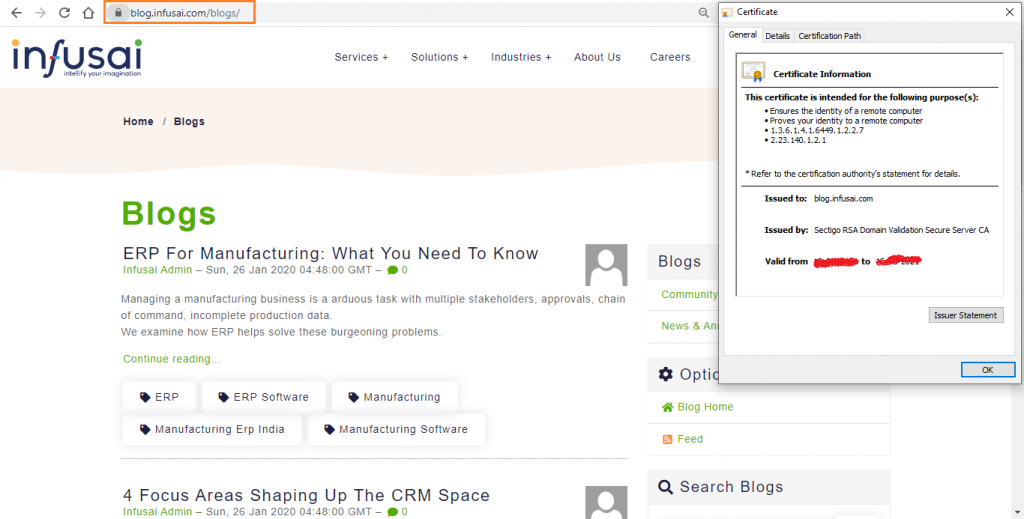
Now, you should be able to browse your Power App portal using custom domain name with your new certificate.
Infusai is Microsoft’s preferred Dynamics 365 Partner serving out of India, Singapore, Europe, USA & Canada.
Click here for any help/support required

really a useful and informative post, thanks for your sharing